


We all use Microsoft 365 Apps like Teams and are enjoying the benefits which they offer, helping to make our working day more productive.
But have you explored the extensive range of Microsoft Apps, which are also included in your 365 subscription?
Microsoft Forms is an online survey creator, part of the Microsoft 365 suite of Apps, which allows you to create surveys and quizzes with automatic marking. Let’s see how the Forms App could be just the tool that you’ve been looking for.
Do you for instance:
Need to capture data from prospects visiting your website?
Want to Survey your customers, to find out how they are using your services and where/how you could offer more?
Is it time for a company event?
Find out where and when you should hold a get together like a Christmas Party or Team Building Day.
It’s time to ask a few simple questions in your Form and share the results.
Creating your Form
Creating your Form is easy!
Head to the Forms App via your Microsoft 365 Homepage, click the Microsoft icon and scroll through the available Apps, or type “Forms” in the search bar.

Click on the ‘New Form’ Button.
Choose what you want to call your Form. This should reflect the topic which you are surveying.

Begin to set up your questions! Don’t worry there are loads of question templates to choose from, allowing you to create a Form that is perfectly suited to your topic.
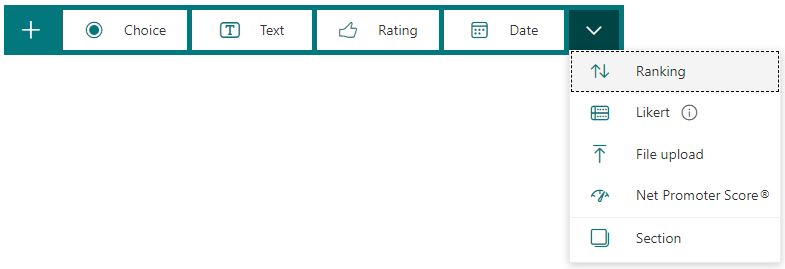
Recipients can use:
Choice: To select multiple options (if they want to).
Text: To type in their answer freehand, allowing them to let you know more detail about their response.
Rating: Giving a star or number rating, between 1 and 10.
Date: To choose a specific date – demonstrating their preferred option.
Ranking: This gives the opportunity to show preferences highest to lowest.
Likert: To gauge attitudes and opinions around the subject you are surveying.
File upload: To upload their own files to the Form. A new folder will be created in your OneDrive so you can monitor uploads.
The Net Promoter Score (NPS) option: Gives the option to provide an opinion based on a 0-10 scale.
Such as giving their thoughts on “How likely are you to recommend our services to other companies like yours?”.
The result will give you an NPS based on the satisfaction rating of your customers.
Customise your Form
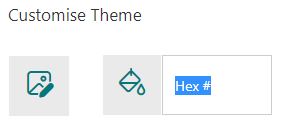
Not enjoying the default colour why not unleash a little creativity by playing around with the themes? Or you could use the Customise Themes option to ensure that your brand communications are streamlined.
Sharing your Forms
So, you’ve set up your Form. Now you need to distribute it, so you can start getting your responses in.
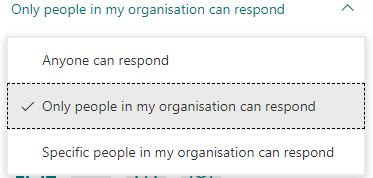
There are three choices when sharing your Form, so you can get to the people who you need to reach and limit responses to your target audience.
- Anyone can respond
- Only people in my organisation can respond
- Specific people in my organisation can respond.
So, you’ve chosen who can view your Form, now you can select how you want to share it! Forms can be shared via URL, email, QR code or an embed code!
Using the embed code option, you can copy and paste into a web page, Sway or a document to link to the form and collect responses.
See your Responses
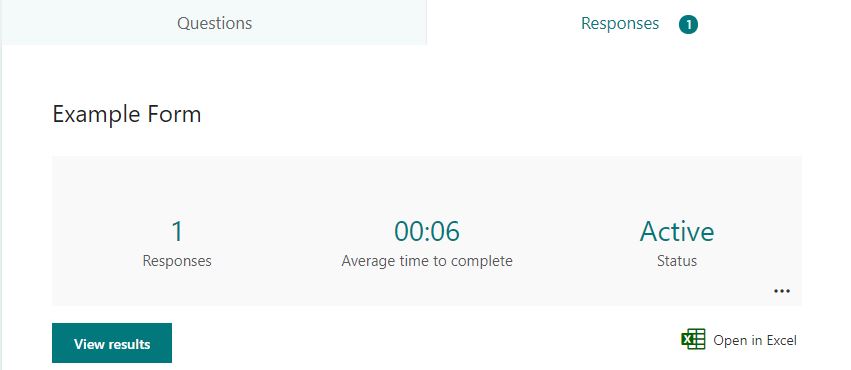
You can use the Responses Tab to see your Form’s data in real time! To gain insights on each question using the Dashboard, or to export the answers to Excel for deeper analysis.
So that’s the basics! Now you can enjoy creating and sending Forms to your customers, partners and colleagues!
Why not review how other Office Apps like Microsoft 365 To Do can accelerate your productivity.
Or get in touch to see how we can help get you started.
